I look forward to seeing you at one or all of our events: Nursery & home garden tour, fruit tasting, nursery catalogue & orchard planner release. No-dig vegetable growing & orchard planning workshops
Wednesday, March 4th, 2020
I look forward to seeing you at one or all of our events: Nursery & home garden tour, fruit tasting, nursery catalogue & orchard planner release. No-dig vegetable growing & orchard planning workshops

Saturday, March 12th, 2016
Bare rooted plants can be kept in their packaging for a few days. Keep them cool and moist by watering the root ball in the packaging, swishing the water around, and then tipping the water back out.
If there is to be a delay of more than a few days before planting, heel the plants in: Soak the roots for 15 minutes in water with a dash of liquid fertiliser. Place bundles into trenches of moist earth and loosely cover the roots with soil.
Animals: Fence from browsing animals otherwise you are buying very expensive animal feed! If Rabbits or Hares are present your trees will need trunk sleeves to 70cm. Fencing animals out? Perhaps you can design this infrastructure to also rotate beneficial animals within the orchard?
Shelter: The orchard site must be sheltered. On a windy site this shelter should be established at least a year ahead. If planting shelter the same year as the fruit trees use very fast species and consider planting not only the perimeter but also within the orchard with shelter trees.
Soil: A depth of around 15-20cm of topsoil is enough for most fruit trees. If drainage is an issue plant on a shallow mound or a swale berm. Balance soil minerals over the whole orchard area with mineral amendments.
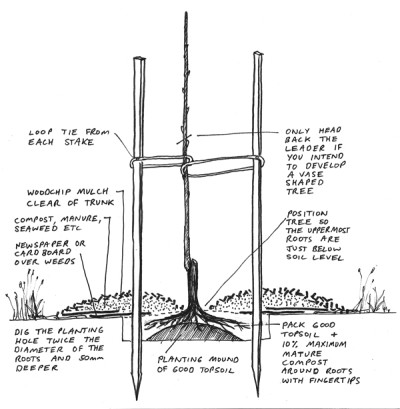 Planting Guide
Plant bare root trees and shrubs from Late June till late August.
Water weekly as needed for the first couple of months and then as needed in dry periods.
Surface feed and mulch each winter (under mulch) and watering in accordance with your soils needs and the plants growth. Establish appropriate groundcover plants to keep weeds, especially grass, suppressed.
Carefully chosen groundcover and companion plants such as Russian and Dwarf Comfrey, Sweet Cicely and Feverfew can help improve soil structure and fertility. They can also aid with pest and disease prevention.
Pinch off all flowers/ fruit in November until tree is growing vigorously and has strong branches, usually in their third summer you can leave a small crop on. Remove all growth from below the graft union.
Most fruit trees will naturally adopt a central leader shape, with a strong central trunk and near horizontal branches radiating off this. Stone fruit are usually trained as a vase shape (see below).
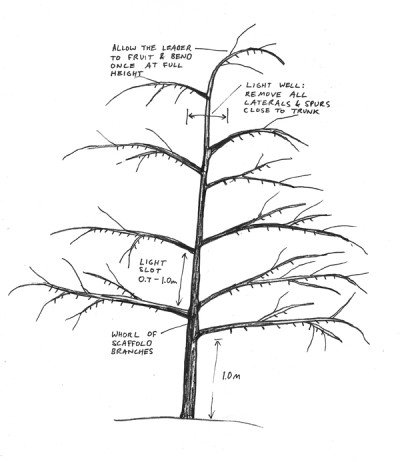 Central Leader
Year One: Leave the trunk un-pruned. Prune off any branches below 1m and any competing leaders. In November remove any developing fruit and train down all branches so that their junction with the trunk is near to ninety degrees and the branch is near to horizontal. Tree training rubber bands, twine or notched spacers can be used for this job.
Year Two: August, prune off any branches below 1m and any competing leaders. Prune out completely any dead, diseased or damaged (crossing) branches. Prune out any fruit spurs on or close to the trunk and any on the lower side of branches. Training aids from November may be removed now if the branches stay in the horizontal position. In November thin out all fruit except one or two near the trunk.
Year Three: Repeat winter pruning, take out whole branches as necessary to create well spaced branches up the trunk. You may leave more fruit on this year if the tree is sturdy. From now on thin all fruit to one or two fruit per spur.
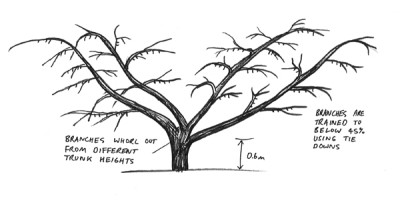 Vase Shape Trees
Year One: Head back the main trunk to around 1m, either to some good side shoots or good buds. Prune off any branches below 0.8m and any competing leaders (side shoots growing too vertically). In November remove any developing fruit and train down all branches so that their junction with the trunk is near to ninety degrees and the branch is near to 45%. Tree training rubber bands, twine or notched spacers can be used for this job.
Year Two: August, select four strong branches to be your main vase structure. Prune off any branches below 0.8m and any vertical shoots surplus to your four main branches. Prune out completely any dead, diseased or damaged (crossing) branches. Prune out any fruit spurs on or close to the trunk and any on the lower side of branches. Training aids from November may be removed now if the branches stay in the 45% position. In November thin out all fruit except one or two near the trunk.
Year Three: Repeat winter pruning, take out whole branches as necessary to create well spaced vase of four branches from the main trunk. You may leave more fruit on this year if the tree is sturdy. From now on thin all fruit to one or two fruit per spur.
Wednesday, May 27th, 2015
In this article I reflect on the Beyond Organic Tour workshops we hosted in April 2015. These were led by Stefan Sobkowiak of Miracle Farms, and covered the principles and concepts used in his Permaculture Orchard.
It was a great pleasure to host Stefan at Habitate Farm for a workshop on fruit tree training and soils. Thanks to all involved for organising the tour and hosting Stefan, Doreen and James here in Dunedin.
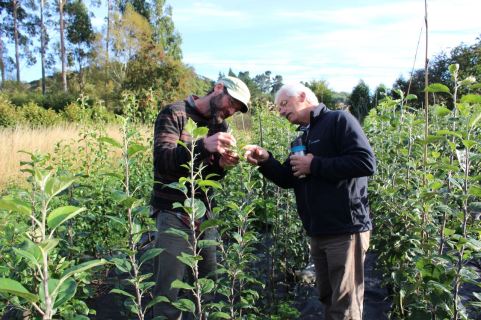 When you are busy on the land it’s a welcome inspiration to have a teacher such as Stefan come and reinforce the principles of permaculture through workshops in your bioregion.
We need well documented examples of permaculture systems and The Permaculture Orchard is probably the best film documenting a commercial permaculture orchard.
Stefan has set up and runs an orchard that produces a quality food for a sizeable customer base.
His customers join as members, then enjoy visiting this beautiful farm, meeting each other and browsing the aisles (rows) to gather food (his is a members-only U-Pick Farm).
For me permaculture is as much about making beautiful inspiring places as it is about the quantity of food produced, so this aspect of his farm was great to see. Flowers are grown, for example, in amongst the productive plants and offered free for customers to pick, adding further delight to the diversity of edibles in each row.
What has made Stefan’s farm successful?
I would say systems design. The basis of permaculture is the conscious design of systems which overlap to form a constructed ecosystem inspired by observed natural ecologies. Stefan has clear, explainable system patterns, that allow for patterned replication and expansion across the farm. Examples are the Nitrogen Fixer-Apple-Pear/Plum trio’s, the ripening-time ordered rows, the tree to shrub to perennial planting patterns, the animal rotations through the rows, the mowing patterns and many more.
One of the great achievements is to have taken the benefits of a forest ecology (layers, diversity, predator / beneficial insect and bird habitat, pioneer / support species) and to have patterned them into a system of rows, allowing for ease of management and customer U-pick harvest (the needs of human nature).
The mulch layer
Looking to the mulch layer we find the key to what has allowed all of this to happen with minimal maintenance. A plastic mulch. A simple logical solution and yet so mind-bendingly hard to come to grips with for those of us that associate plastic with environmental degradation.
In Stefan’s system it is allowing large scale diversity and production. Stefan’s is a commercial operation,with irrigation, posts, wires and overhead sprinklers for frost fighting, there is a lot of infrastructure there, why not add a layer of plastic and be rid of untold hours of weeding and instead use that energy for establishing and harvesting the diverse and abundant produce?
There may be some good reasons. I am sceptical as to whether this system would work as well in a coastal New Zealand climate where grass and other weeds grow all year round. So many books and now movies on permaculture are from either sub-tropical or continental climates, we have to take the principles of these ideas and examples and not necessarily the techniques. I hope someone, (including myself), tests this plastic system in a coastal New Zealand climate. Unfortunately I have seen too many examples over the years of plastic or weed mat put down permanently on the ground only to be overrun with grass and buried, and then the weeds we are trying to avoid, grow back on top. I have had to remove plastic layers buried amongst ornamental gardens, tangled with roots. It’s a difficult, destructive job.
Stefan has observed worms moving organic matter through holes to underneath his plastic. In local ornamental examples that I have seen this has not happened fast enough, the garden looks brilliant for the first ten years and then plants start to decline, the soil below the plastic layer is starving for organic matter from above.
In this, his latest video, Stefan shows the difference in growth rate where plastic was not used, no competition does make a huge difference.
An alternate system that we are using for orchard/food forest establishment is based on Martin Crawford’s system of using woven weed mat.
 We put a strip of weed mat each side of a newly planted row for one or two years and then lift it and immediately plant heavily with carefully chosen varieties. The weed mat if carefully moved can be used again and again to kick start more orchard / food forest rows – perhaps a useful system up to a small commercial scale.
We have a side by side trial with a row that has support species planted and is minimally weeded and only roughly mulched. Growth in the weed matted row is at least thirty percent more after the first year.
Because of our non-stop grass growth the use of animal grazing as the primary understory layer of production has strong appeal. This limits under tree diversity but gives us important animal yields.
Training vs Pruning
I am sold on the tree training techniques that Stefan introduced us to. They are brilliantly systematic and solve many of the issues that I have had with trying to combine heading back of branches and only half training branches down. I look forward to trialling these on new trees and renovating old trees to this system.
Stefan talked a lot about autumn tree planting for good establishment of trees. This year through my nursery I am offering an earlier delivery of our certified organic bare root fruit trees (the end of June) and several customers from Stefan’s workshop have requested this. Hopefully the apple trees believe that autumn is here by then as they are still in full green leaf as I write in mid-May.
I have always pruned back my nursery trees before delivery to around one metre so that they grow strongly and branch low for my home gardener customers. I will leave them un-pruned for anyone wanting to use Stefan’s training system, if so I think you need to ensure little competition, good fertility and consistent moisture to achieve the growth and branching required. Growing Fruit Trees: Novel Concepts and Practices for Successful Care and Management covers the techniques Stefan described.
I look forward to many more well documented evolutions towards our shared vision of beautiful, diverse, productive, perennial polycultures.
Jason Ross
Link to the article on the Beyond Organic NZ Tour Website:
Monday, June 23rd, 2014
Jason shares his deep understanding of FRUIT TREE PRUNING on the Eco Living in Action radio show, originally aired on 12 July 2012 on Otago Access Radio 105.4FM. You can listen to the podcast at http://www.accessradio.org/media/download/201406161057381402873058-32k-2012-07-12—Eco-Living-In-Action-Show—Backyard-Biodiversity.mp3?_uid=1402872917-838-13
Maureen Howard hosts a 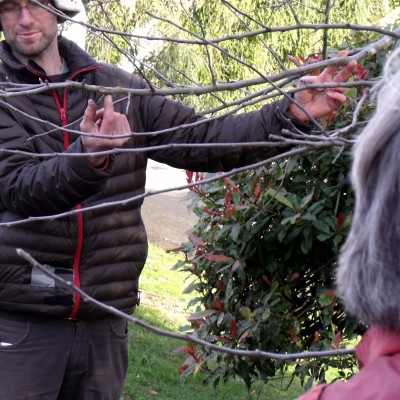 half-hour sustainable living radio show called Eco Living in Action that is aired on Otago Access Radio 105.4FM every Thursday from 2.30pm -3pm.
From making your own cleaning products to composting, recycling, keeping chooks and reducing your carbon footprint, Maureen and her guests will inspire you with practical, everyday solutions that make a difference.
To listen to previous podcasts or to listen to the radio station online go to http://www.oar.org.nz
 Maureen is a fantastic sustainable living educator. She is contracted to the Dunedin City Council to provide information to the community on waste minimisation and sustainable living www.dunedin.govt.nz/services/sustainability-education/sustainable-living
For more information about what Maureen does, please contact Maureen by email mhoward@slingshot.co.nz
Friday, November 16th, 2012
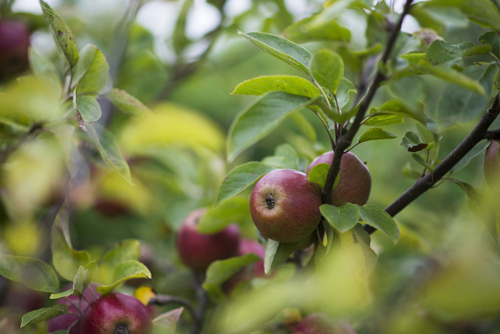 We have just thinned the very good fruit set of apples from the nursery cordon, otherwise it would have been very overloaded. This 7 year old espalier of 38 varieties of apples is where we get our cuttings (scion wood) from.
Early Summer Tasks in the Orchard
It is a beautiful time of year out in the orchard. We enjoyed some good conversation and garden tip sharing recently when we were out working in the Waitati Open Orchards. Here are a few tips for timely activities for early summer in the orchard.
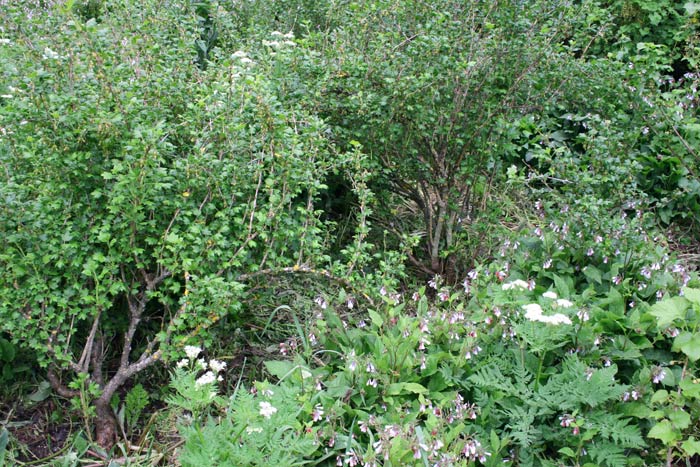 Old gooseberries with companion plants chopped and dropped beneath them to feed the soil.
Tuesday, April 24th, 2012
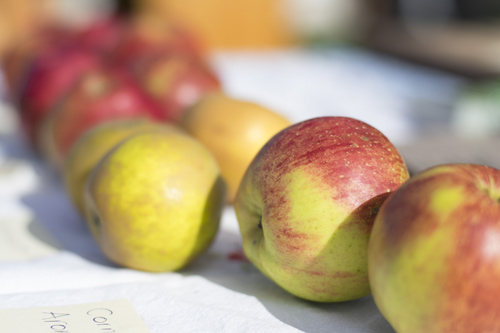
Science is slowly catching up with what we can taste and feel: “Older varieties of fruit and veg may be considerably healthier than their modern supermarket equivalents, researchers claim”.
One of our all time favourite apples, Egremont Russet is mentioned in the following article a friend just sent me:
http://www.nzherald.co.nz/
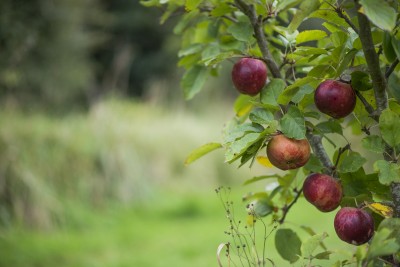
Pictured are apples on our display at the Waitati A&P Show.